Welcome to our gardening blog!
Today, we are excited to introduce a fantastic DIY project that will enhance your garden’s beauty and functionality—a raised garden bed with a seating cap and pest protection. Whether you’re a seasoned gardener or just starting out, this project is perfect for growing healthy, thriving plants, especially tomatoes. Let’s dive into the details and show you how to create this beautiful and practical addition to your garden.
Also be sure to check out our raised garden bed plans page and get your FREE download!
Materials Needed
Before we get started, let's gather all the necessary materials. Here’s a comprehensive list with prices:
Raised Garden Bed
(6) 2 x 6’ x 10 ft long ($10.52 x 6 = $63.12)
(2) 2 x 4 x 8 ft long ($3.63 x 2 = $7.26)
1 Box of 3” Deck Screws ($35.98)
1 Roll 1/2″ Hardware Cloth (3ft x 25 ft) ($59.98)
1 Roll Landscape Fabric (Weed Barrier) (3ft x 50ft) ($23.98)
1 Roll Plastic Sheeting 10ft x 25ft ($16.48)
1 Box Stainless Steel Staples ($13.98)
Raised Garden Bed =
Total = $220.78
Seating Cap (Optional)
(2) 2 x 6 x 12 ft long ($12.33 x 2 = $24.66)
Raised Garden Bed + Seating Cap =
Total = $245.44
Trellis
(2) 4 x 4 x 8ft long ($12.72 x 2 = $25.44)
(2) 2 x 6 x 8ft long ($5.07 x 2 = $10.14)
(4) 2 x 4 x 8 ft long ($3.63 x 4 = $14.52)
1 Box 5/16” x 4” GRK Construction Screws ($24.98)
Raised Garden Bed + Seating Cap + Trellis =
Total = $320.52
To Fill:
8 bags of Kelloggs 2cu ft organic raised garden soil mix ($9.98 x 8 = $79.84)
2 bags 1 cu ft Garden Time organic mushroom compost ($2.88 x 2 = $5.76)
(1) 12 oz bag Sta-Green Earthworm Casting 4-lb ($12.97 x 2 = $25.94)
(1) 4lb bag Espoma bone meal ($9.97)
(1) 3lb bag Espoma blood meal ($9.97)
Total = $131.48
Raised Garden Bed + Seating Cap + Trellis + Fill =
Grand Total = $452
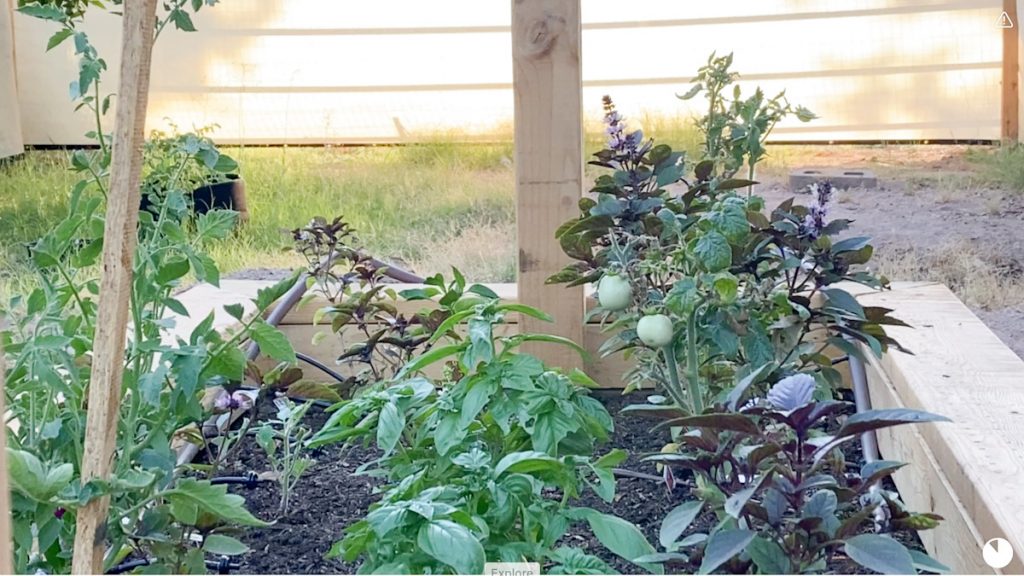
This bed is 3 feet by 7 feet, made from Kiln-Dried Douglas Fir wood, and includes a comfortable seating cap that goes all the way around.
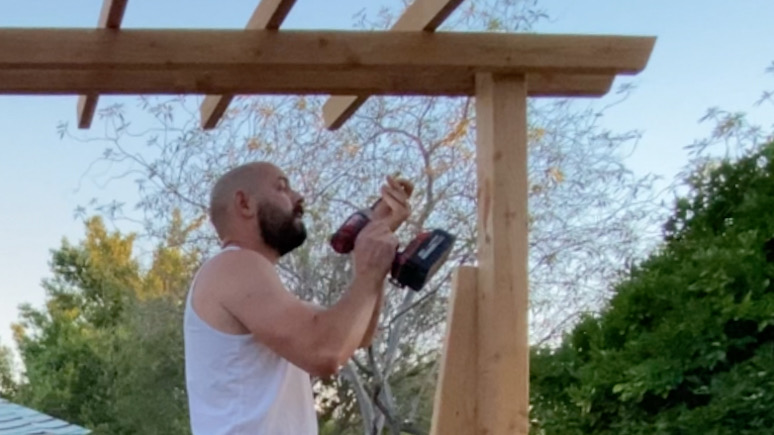
First, we started by cutting our Kiln-Dried Douglas Fir wood to size. For the frame, we used 3 pieces of 2×6 at 7 feet for the longer sides and 6 pieces of 2×6 at 3 feet for the shorter sides and internal support.
Helpful Tip
*A piece of advice when it comes to building your raised garden bed, is to take into account the measurement of hardware cloth. Because hardware cloth is hard to work with, I recommend basing the measurement of your raised garden bed by the width of hardware cloth so as not to have to cut the hardware cloth more than necessary due to the spring back and stiffness of the cloth.
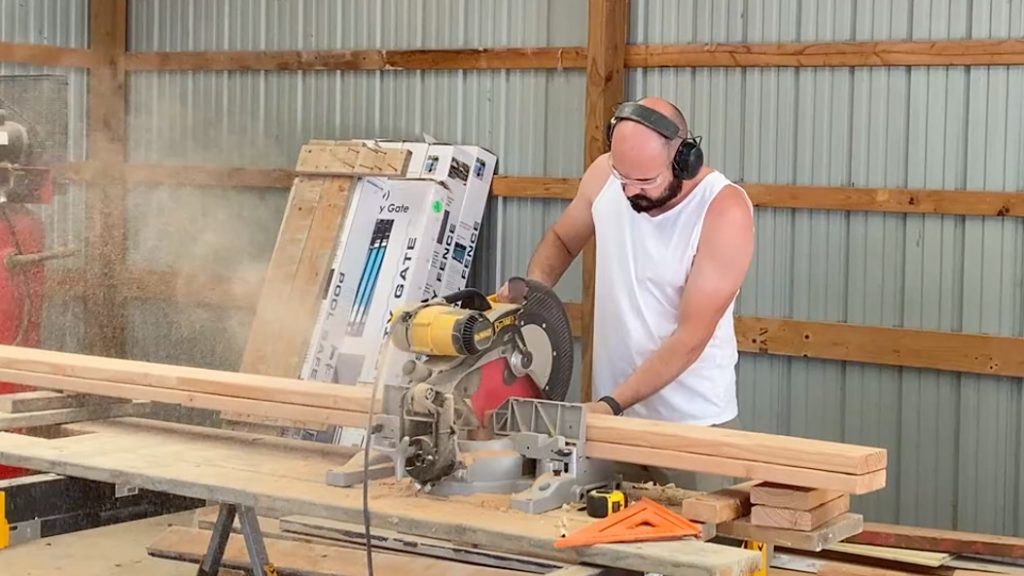
Next, we assembled the frame. Using 3-inch wood screws, we connected the 7-foot pieces to the 3-foot pieces, creating a sturdy rectangular structure. For added stability, we screwed in 2×4 pieces at each corner.
To add the seating cap, we used 2×6 pieces cut to fit around the top edge of the frame. This not only adds a finished look but also provides a comfortable place to sit while gardening.
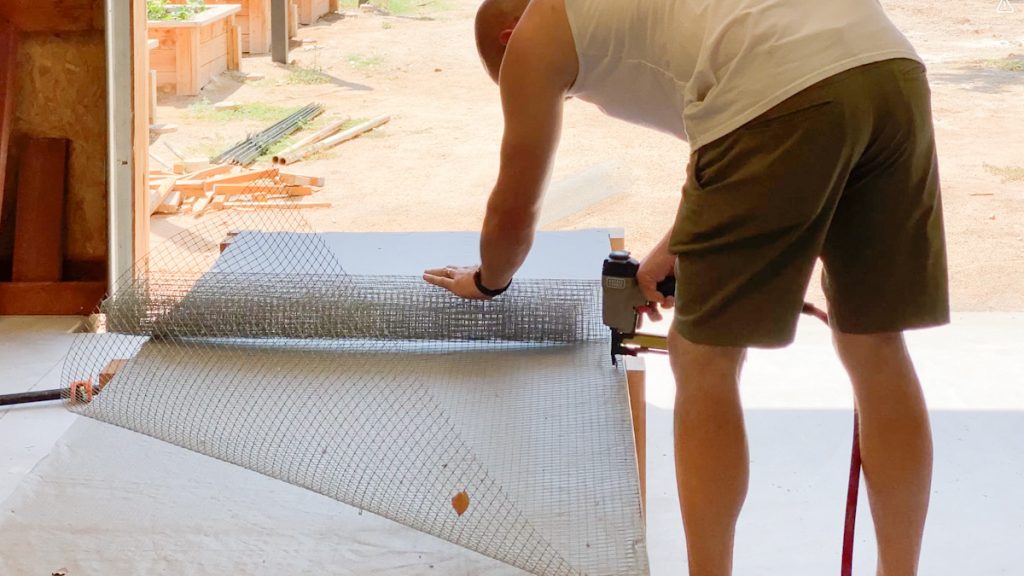
Next, we lined the bottom of the bed with landscape fabric. This helps prevent weeds from growing up through the soil.
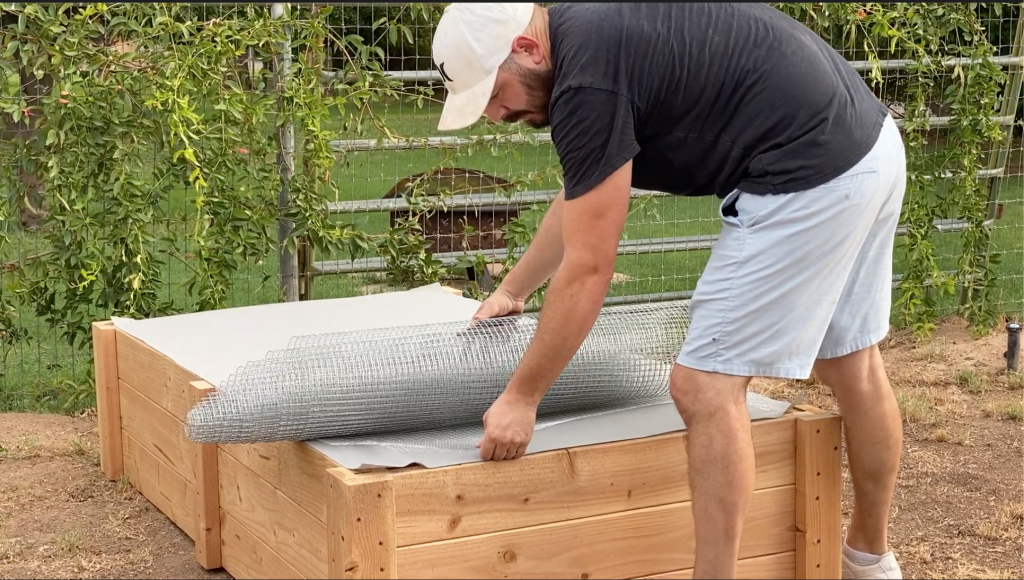
Before moving forward, we attached 1/2 inch hardware cloth to the bottom of the bed. This is essential for keeping out pests like gophers and other burrowing animals.
Next we attached our plastic sheeting to the inside of the bed which will help insulate the soil, control weeds, and conserve water. It will also prevent the soil from leaking through and staining the sides of the bed.
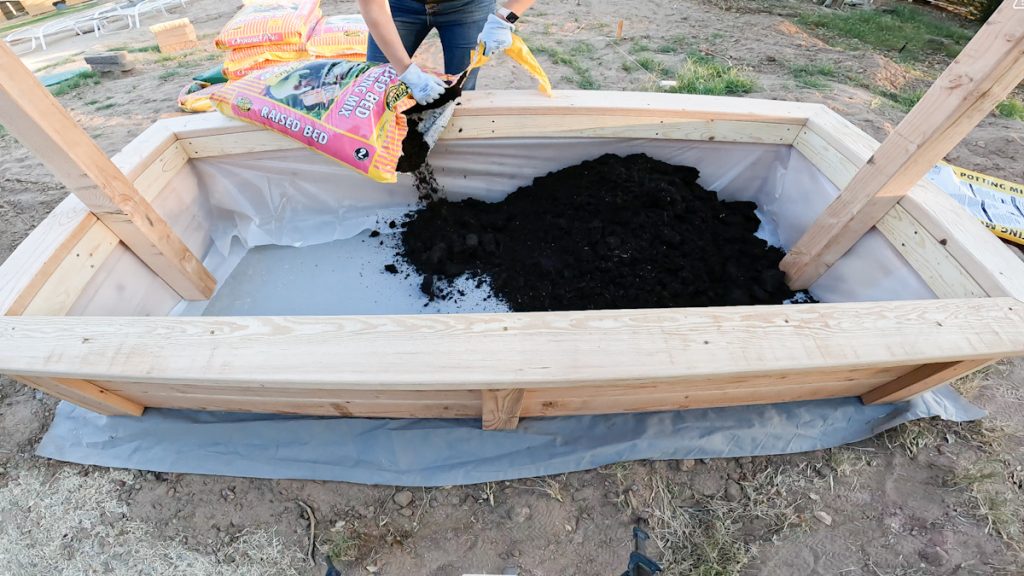
We then filled the bed with a mix of soil and compost, perfect for our tomato plants. I also like to add earthworm castings, bone meal and blood meal to my mix.
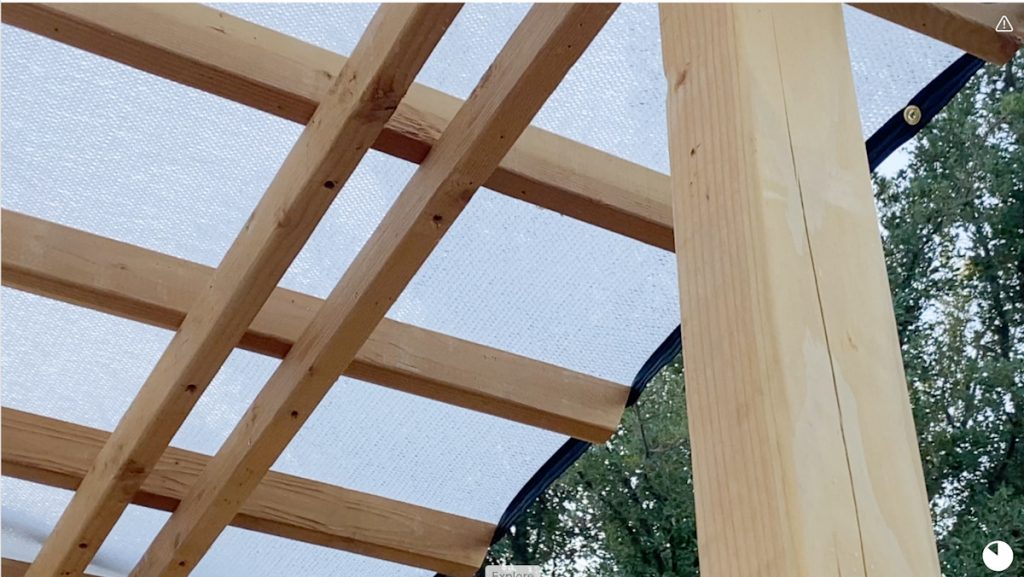
To protect our plants from excessive sun exposure, we added a 50% UV Protection Shade Cloth over the bed. This will help in maintaining an optimal growing environment for the tomatoes during our hot summer months.
And there you have it—a raised garden bed with all the necessary protections, perfect for tomatoes or any other plants you wish to grow!
Building a raised garden bed with a seating cap and pest protection is a rewarding and practical project that will enhance your gardening experience. Whether you’re growing tomatoes or other vegetables, this bed provides a perfect environment for your plants to thrive. We hope this guide has inspired you to start your own raised garden bed project.
If you have any questions or would like to share your gardening experiences, leave a comment below. Don’t forget to check out our YouTube video for a detailed tutorial and subscribe to our channel for more gardening tips and DIY projects. Happy gardening!